Following on from the race in Brazil, we’re at another fast, challenging and dangerous circuit, the Autodromo Enzo e Dino Ferrari in Imola in northern Italy. The race has a lot in common with the one at Interlagos so the same general advice about being cautious applies. Here are some specific tips:
Know your overtaking points. They exist on nearly every corner, but most opportunities only open up for a moment so you have to be committed.
Be careful where you try to overtake on the long run from the grid down to the Tosa hairpin. Use slipstreaming to get by on the left into Tamburello or on the right on the long section afterwards. Never overtake on the right into Villeneuve or you’ll get cut up; hold back and go by under braking on the inside.
There’s nearly always a big pile-up on the first lap at the hairpin. Avoid this by keeping to the left and holding well back.
The sharp Acqua Minerali chicane is a good place to overtake, but no more than one car at a time. Out of traffic, the key to taking this corner steadily is to keep stable under braking and stay well away from the right-hand kerb as you turn in.
The Variante Alta chicane is fast at 130mph+ on a good lap, but in a long race take it steadily as it’s an invitation to an accident. Being slow through the middle means you can get the power down early on the exit and maybe slip past a backmarker.
The slight right under the bridge before the run down to Rivazza is a death trap in the wet. Lift off the throttle as you go through.
The final fast esse at the Variante Bassa is best taken smoothly with minimal braking and without changing down. If you want to overtake going into the slow final corner you can, but will find the controls won’t respond unless you’re almost on the gearbox of your opponent, and gaining on him too. It’s like the slow infield right-handers at Interlagos in this respect.
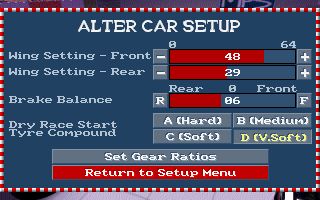
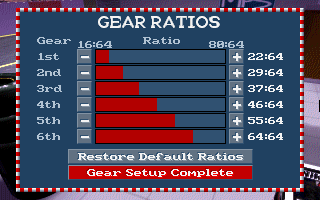
Here are my car settings for this circuit. The wing settings are low to allow easier overtaking, but you’d be advised to crank the rear up a couple of notches to make it less tail-happy. Tyre wear is low, so take the D grade and stop twice (perhaps even just once) over a complete race distance.
Settings for the San Marino GP at the Imola circuit
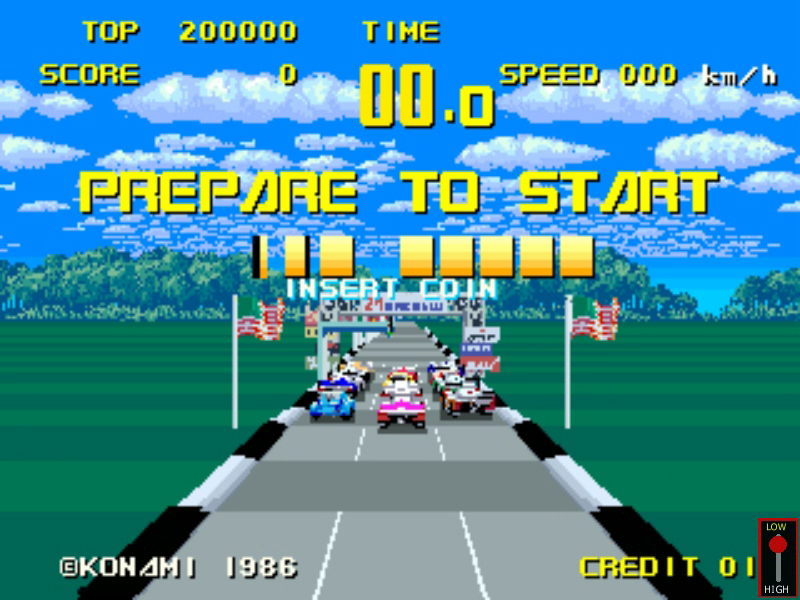
Here is a game based on the greatest race in the world – the Le Mans 24 Hour Endurance race. It’s very much in the Outrun style, and was rather overshadowed by that classic game. I’ve never cared for Outrun. I don’t like the way the graphics jitter about as they stream towards you, and the controls have always seemed “mushy”, giving little feel for the road, even compared to something as simple as Pole Position.
I was reminded of this game by a review I watched the other day (Xyphoe’s Amstrad Le Mans review). The consensus seems to be that this is a very hard game. I decided to dig out my MAME copy to see if it’s hard as he made it look. Quick answer: no, it’s really quite easy. At least it’s much easier to complete a four lap race than it is with Pole Position for example. Here’s tip No. 1 already:- use mouse controls, and turn the sensitivity right down to 1%. Without being able to steer the car smoothly and gently across the track you’re going nowhere.
Game overview
The race is over up to four laps, with checkpoints dividing it into three sectors, with a bonus of about a minute added after each. The controls are exactly the same as Pole Position: analogue steering, analogue throttle, brakes and hi-lo gears. And just as with the classic you won’t need much finesse for anything but the steering. The graphic style is familiar enough but quite attractive for the time, and as the race is taking place over 24 hours you’ll see the transition from day to night and back via changes in the colour pallette.
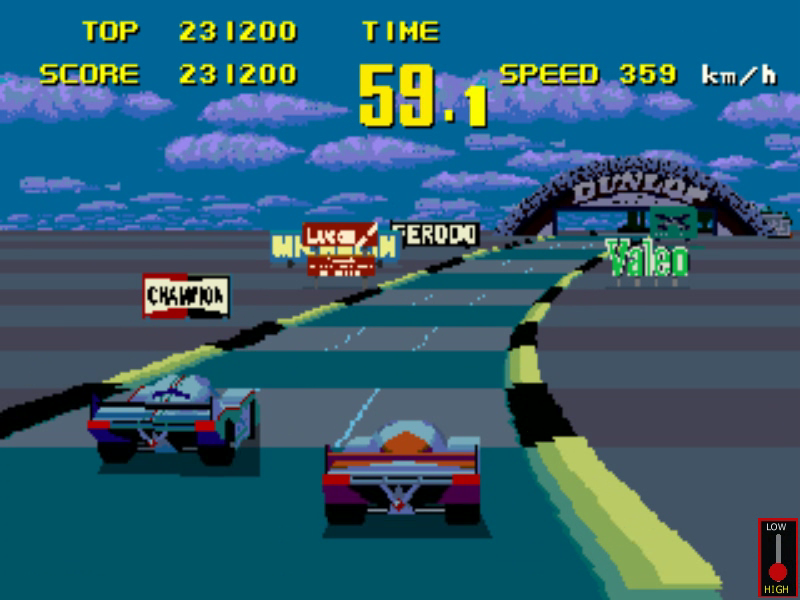
The track is based loosely on the real circuit of La Sarthe, in much the same way as Pole Position was on Fuji. Check out Derek Bell’s lap in a Porsche 956 in 1983 to see how fantastic it used to be before the chicanes. You can vaguely recognise landmarks such as the Dunlop curve and Mulsanne straight, but the corners are smoothed out to make the lap flat-out nearly all the way.
Getting down to playing
The first thing I didn’t like was the car design. It looks too tall, like someone had put a “rocketship” aero cover over a pre-war roadster. Really naff, and the worst rendered car in the game. Roadside graphics could have been more appropriate; I would have liked to have seen some grandstands at least. And the day-to-night palette changes could have been more dramatic; Atari’s Enduro generated more nighttime atmosphere even on the VCS. Sound effects are weak, especially the engine, though the other cars do make satisfying (if hardly realistic) explosive engine booms as you pass them.
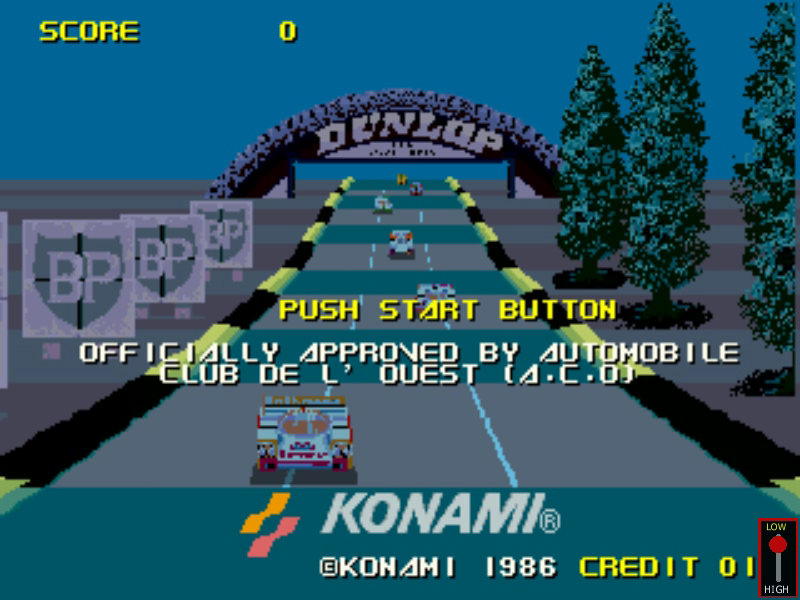
I wish more attention had been given to getting the circuit right. It weaves from side-to-side and up-and-down in vaguely the right directions, but there’s no reason they couldn’t have made it almost fully accurate. The most iconic view of the real circuit is of the cars approaching from under the Dunlop bridge downhill towards the Esses; it’s even used in the attract sequence here, but in the actual game the downhill run is completely flat.
The kerbs are rather high, but instead of bouncing off them your tyres seem to find a magnetic attraction, slowing you down in a wearisome sort of way. Hitting another car or obstacle gently sends you into a giant end-over-end rolling sequence like you were taking the mick out of Anthony Davidson. Which is fair enough, but a featherlight graze of another car sends you into a sequence with exactly the same penalties of time wasted (half a dozen seconds) and car damage (zero), only you are spinning flatly rather than cartwheeling. How much better if minor knocks rattled you offline or pitched you sideways a bit, giving a skilled driver chances to recover.
Those are the main complaints out of the way (I’m not going to get into stuff like “If the race is supposed to last 24 hours why do you get points for time remaining at the end?”). When you’ve gone through the learning curve and it actually comes down to playing the game I have nothing but praise. You certainly need to get the hang of the controls, but with time the mouse feels so at one with the car that you seem to be controlling it by thought alone. Only the sharper corners need some visual feedback to check the car is turning as tightly as you want.
Master the circuit and, except for two slow hairpins, it’s flat-out all the way. It’s just the other cars you have to deal with now, and here the game really excels. The first time you go through the Esses at full throttle, weaving past the opponents on either side, is as exciting as it is satisfying, and a taste of things to come. This is the key to this game’s success: it flatters the player. Other games have your rivals weaving all over the track or deliberately blocking you, but here they stick to their lanes so you can pass on the best side with confidence. The effect this has on later laps is profound. It’s breathtakingly exciting to flash past trains of speeding cars on the narrow track with inches to spare, though it doesn’t take much skill to do it. You just have to keep your foot in and believe everyone will stay out of your way.
Hints and tips
If there’s one playing tip I had to give above all others it would be be committed. You have to keep your foot to the floor as you gain on another car; if it’s on its own it will stay in its lane and you can be confident of passing cleanly, except on the tighter kind of double bends. Notice there are two models of cars, the sport prototypes like yourself and the slower GT class with the Porsche Turbo body style. These latter should normally be nipped past on the inside of curves, while the faster cars may have to be passed on the outside. This is against your instincts as it means steering to actually hit the car, but don’t worry, you’ll drift safely to the outside of it.
Learn to drive in lanes; use the middle lane by default. This is different to most racing games, but here the ability to keep to a lane on the smoother corners will pay off in safe overtaking. But with the tighter kind of esses there’s no choice but to use a racing line. There are only two slow corners where you need to use the brakes. Approach in the centre lane and hit the brakes early, attempting an easy middle line rather than a racing line. Try and be clean on these corners with a smooth exit rather than a rally-cross approach.
When you are gaining on a pack of cars at a dangerous place on the track, ease off early and hang back for a while rather than get on their tails. Lifting off the throttle briefly can gain enough time to nip past another car cleanly, but going bumper-to-bumper only seems to slow down the car ahead even more, meaning you have to absolutely stand on the brakes to avoid it. As you practise and achieve more consistent lap times you’ll find car placements falling into patterns which are easy to remember.
All-in-all you shouldn’t find it too difficult to finish the race, at least compared to similar games. Remember you have several seconds in hand if you can avoid crashing, so it’s more important to be clean and consistent than to be a maniac on every corner. When you back off the throttle you’re not losing as much time as you think.
Track guide
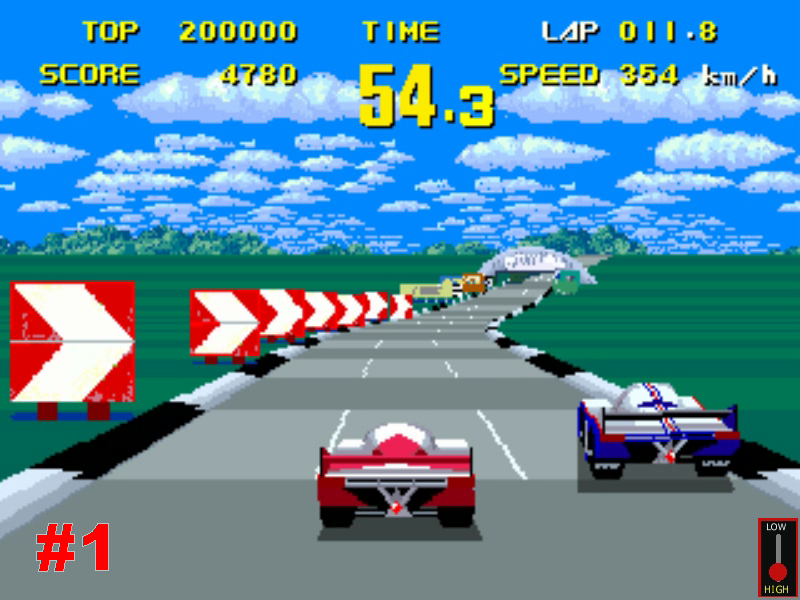
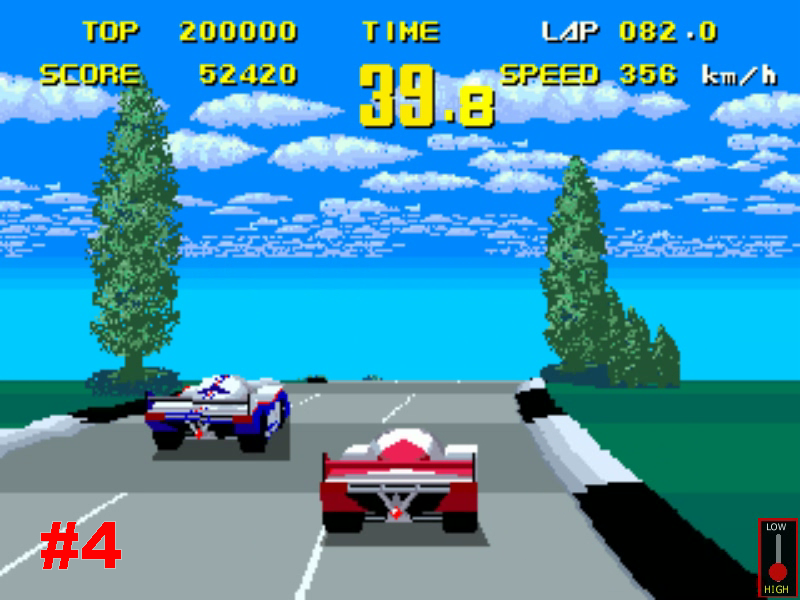
This is a pretty basic guide for beginners and people who are struggling with the game, essentially only dealing with the first lap. Note that you may need to restart the game to see the same car colourings as I describe here. Please refer to my video above as well as the inline screenshots. So first off, start in low gear and change up at about 160kmh – it’s not absolutely critcal when. The first challenge is to slip calmly past the Rothmans car (pic #1) on its left and take the gentle curve past the Dunlop bridge. Easy, as long as you have your controls set up right. If you don’t find it easy the only thing you’re going to gain from the rest of the game is frustration.
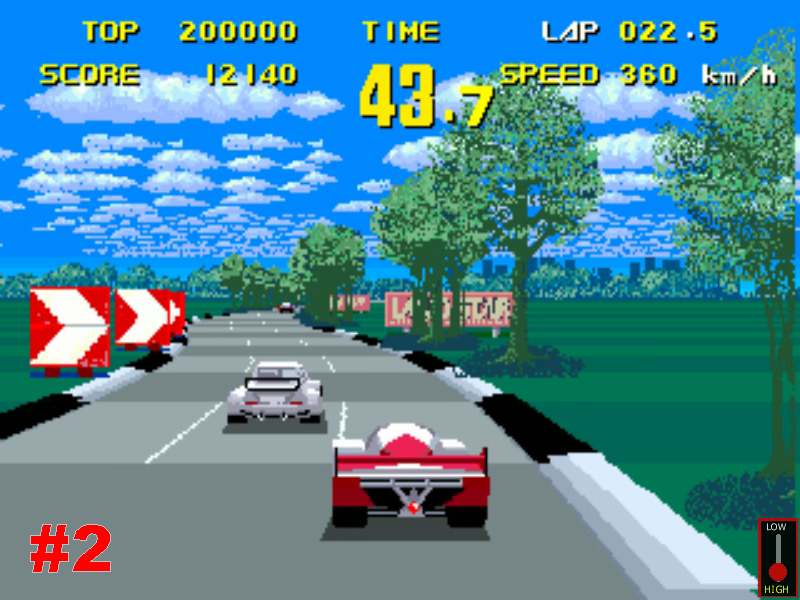
Challenge number 2 is the Esses: pass on the left at the approach, then move to the right of the slow Porsche (#2). This again should be easy, but does require confidence. There are then two long fast right-handers leading on to the Mulsanne straight. Decide well in advance which side you’ll pass the cars you will always find here. On later laps you may need to back off a little to clear some space. Remember to do this nice and early and you’ll have no dramas.
On the long straight keep to the right. If it’s clear it will stay clear; sometimes another car will squeeze you by cutting a little into the lane but you can handle this. Normally you’ll have no problems, though sometimes violent jinking is needed to weave through the pack of cars that can build up at the beginning of the straight.
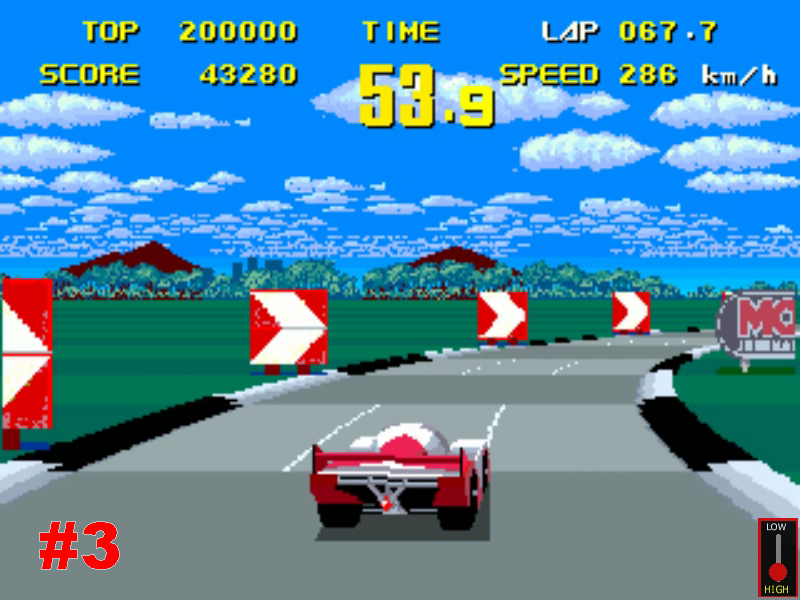
After the checkpoint there’s another easy sweeping right-hander, followed by the first hairpin. Approach in the centre lane (#3), brake fairly early and try to stay in the middle of the road, though in fact you will be taking something of a racing line. It’s surprisingly easy to mess this up, so try to be consistent; it will keep you “on pattern” with the other cars.
The end of the next straight will see you gaining on another Rothmans car with seemingly little room for manoeuvre on either side. Pass on the right (#4); it’s easy as long as you can steer accurately and stay in lane.
After the next sweeping right you’ll encounter the first real challenge: a flat-out left-right plunging curve. It will take some practice to do this regardless of any other cars, but once you’ve mastered it you’ll have the problem of the car you encounter on the lip of the exit. If it’s a slow GT car there seems to be no option but to slam on the brakes to give you time to pass on the left. But it should be a fast car, and if you steer to the right so its seems you’re going to ram the back of it you’ll drift safely to the left (#5). Take car not to hit the kerbs.
There follows a long sweeping left on the approach to the checkpoint. This can be a little dicey in traffic, but follow the general rule of passing slow cars on the inside, fast on the outside.
Next is a very long left-hander. Always hang to the right on this, and you can take it flat out. Make sure you steer consistently to the left as much as you can but without ever having to move back to the right to avoid another car. Check that your car graphic is actually turning the full degree (#6) as you approach the end of the turn. I mess this up in the video, for which there is no excuse.
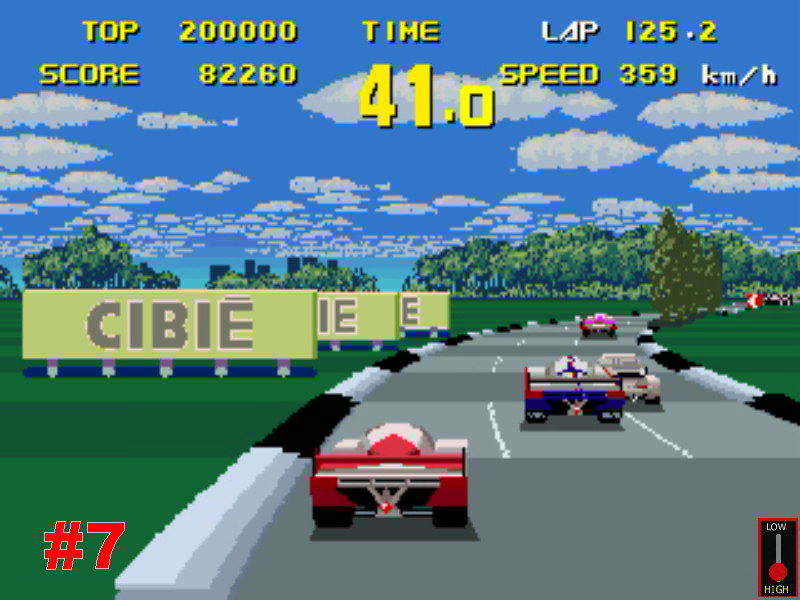
After this there’s a difficult sequence of bends. Stay to the left as much as you can, especially on the entrance (#7) and exit. This part can be done flat-out without too much bother on the first lap, but later you may have to back off in the middle. The short straight ends with a tight left-hand hairpin. Treat it just the same as the right-hand one earlier.
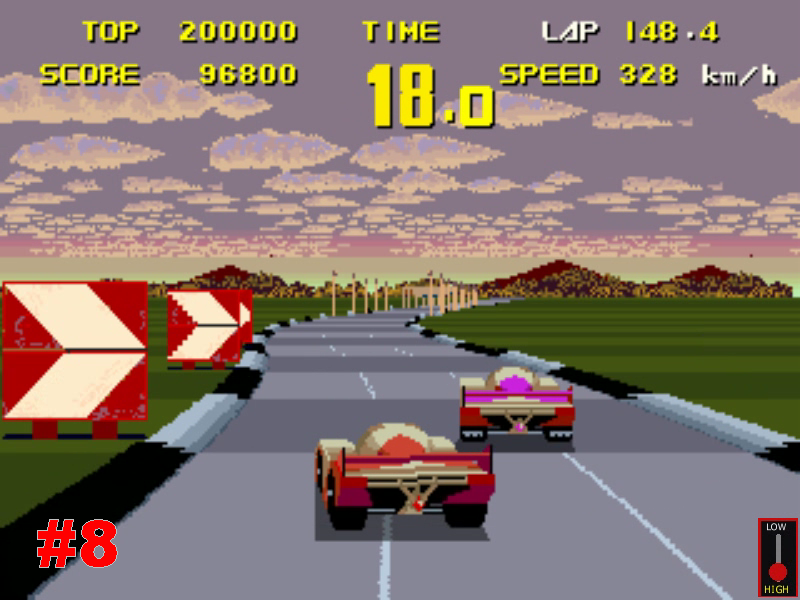
The final sequence is a left-right esse. This is tricky. As a guide you should try to beat a slow GT car into the corner, but hang back a little from the fast cars (#8) before blasting past them on the exit. I always deliberately take this cautiously on the first lap, not just for safety but because I actively don’t want to be too fast here. Passing the purple Porsche before the finish line puts the game into a more difficult pattern for the next lap.
Go and play it
I strongly recommend WEC Le Mans. It’s certainly not innovative, but it is very exciting, and without being as frustrating for less gifted players as better-known games in the same genre.
A lot of people ask how to find diamonds in Minecraft, and sometimes they get bad advice. I was reminded of this while watching Kikoskia in his YouTube Let’s Play Minecraft Hardcore. It’s a wonderful series, wouldn’t miss it for the world, and what got me interested in the game in the first place. But yesterday he spent nearly twenty minutes looking for diamonds and didn’t find a single one. That wouldn’t surprise Kiko fans in the least, given his “human randomiser” strategy for exploration.
I’m not just going to show you how to find diamonds in about five to fifteen minutes, I’m going to try to explain and justify the efficiency of the strategy too. It’s for the Pocket Edition by the way, though on the PC things should be much the same. So here’s the condensed version of the two-step guide to finding diamonds:
1) Dig down to a suitable depth – exactly 48 blocks below sea level is good.
2) Dig the smallest tunnel in the straightest line until you find diamonds.
Now to expand on point 1). You might ask “How do I reach exactly 48 blocks down? I always lose count”. Answer: dig to exactly sea level. Then craft exactly 48 compact stair blocks. Create a staircase out of these blocks. Simple, and it’ll make climbing up and down the mine a whole lot easier than with whole-block steps. I’m not sure about the exact figure of “48” by the way – I don’t look up details like this online if I can help it, but it works for me.
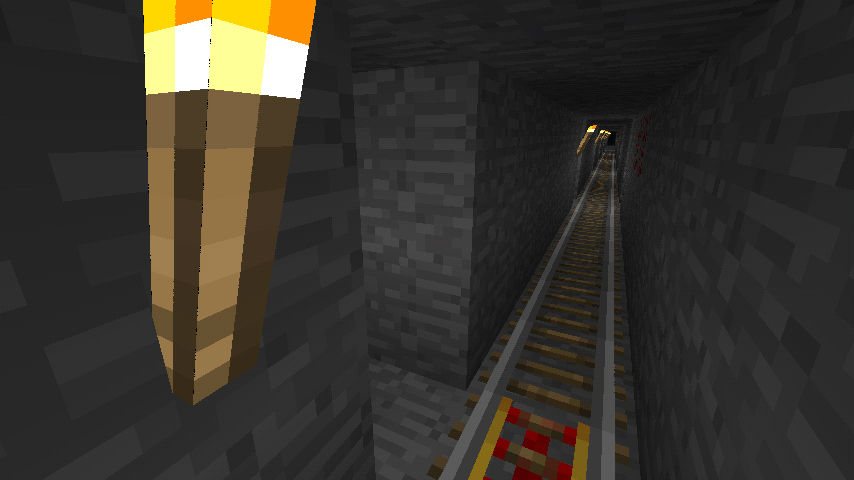
As for point 2). The smallest tunnel is 1 block wide by 2 blocks high. The straightest line means you simply go straight and level, and never deviate to the side or up and down. Put down a torch exactly every 8 blocks, always to the same side so you can tell later whether you’re coming or going. To avoid losing count, always ignore any goodies you uncover until you’ve made your 8 steps, then go back and dig them out. I always backfill when I dig out the ores – it stops monsters spawning in the cavities, and stops the mine turning into Swiss cheese.
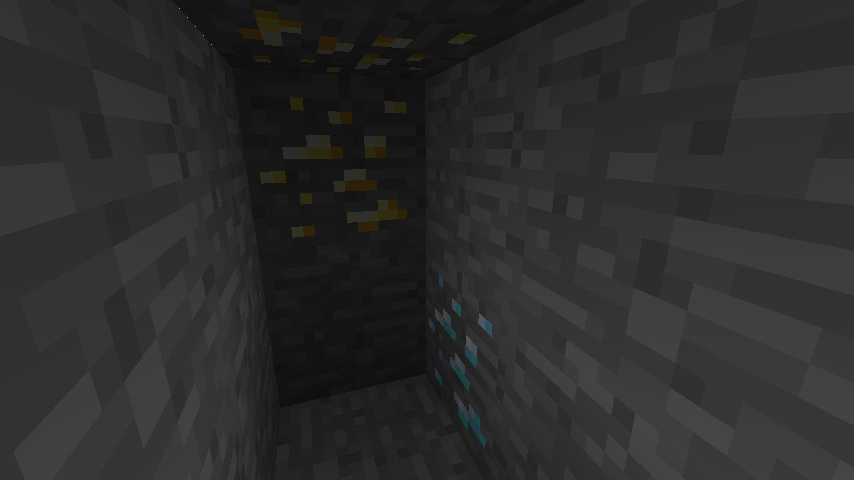
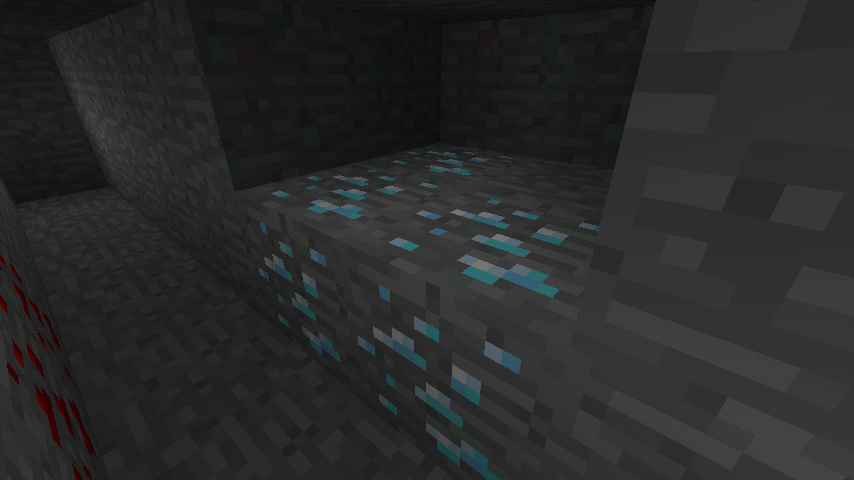
After putting down a maximum of 32 torches you’ll have reached the edge of the map. On average you’ll find diamonds (or gold) about every 200 steps, with an average of perhaps 5 blocks per deposit. The screenshot below shows a rare example of discovering gold and diamond at exactly the same moment – believe it or not it’s what actually happened when I went to get pictures for this article. But there’s a fair chance you’ve come up empty handed. What now?
Answer: dig new tunnels at right angles to this first one, exactly every 8 blocks, right by where you put down the torches. Keep grinding away till you’ve got what you want. Always use the best equipment by the way – stone picks went out with the, er, Stone Age. See below for a mine where the tunnels have been dug out to the left.
Why this dimension of tunnel? Digging a 1×2 block tunnel uncovers 8 fresh new blocks for each 2 blocks removed (2 to each side, 1 above and below, 2 straight ahead), or a 4:1 ratio. That’s the maximum you can practically achieve, and means you get the most use out of your tools and time.
Why space the tunnels 8 blocks apart? It’s a good compromise. The idea is to mine out an area thoroughly while exploring as much new ground as possible, that is without “discovering” the same deposit twice.
What do you do when you’ve mined the whole level with these long thin tunnels 8 blocks apart? You dig new tunnels exactly half way between them, that is 4 blocks apart. And when you’ve dug all these? Go down exactly 4 blocks and start the whole thing all over again.
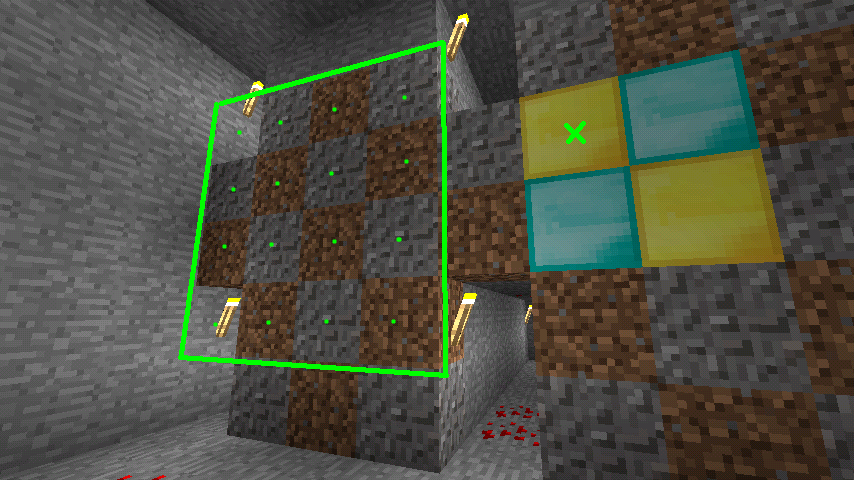
What’s the logical justification for this method? How can we show it uses little effort while being unlikely to miss anything of value. Each deposit of diamonds (or gold) is based on a 2×2 block floor plan. There is usually a second layer on top, making 2x2x2. Sometimes there’s a third layer too. See above for an example. They all seem to be in this pattern, though I suppose two deposits could overlap confusing things. To simplify, suppose we are looking for the 2×2 “Battenberg cake” vertical slice through a deposit as shown in the diagram below. Actually the deposit will be made of two slices, improving our chances of finding it, but each slice will probably not be complete thus reducing our chances. Then again, there’s the cases where there’s a third layer, again improving our chances.
Suppose we’ve been tunnelling into the screen. The screenshot shows a section through the mine. Notice there is a repeating pattern, 4×4 blocks square, of which only 2 have been dug out. So suppose we are looking for a slice like the one to the right, but it could be anywhere. What are the possibilities for its position? Imagine moving the slice so the small green cross matches the position of any of the dots. Allowing for the repetition of the tunnel pattern there are 16 distinct dots where the slice could be. Notice that only 2 of these have no blocks of the slice exposed in the tunnels where we can see them (the position where you see it now is one such). Therefore you will spot it 87.5% of the time, despite only having dug out 12.5% of the blocks.
I hope that makes things clear. If the explanation wasn’t clear, I hope at least the method was. Happy diamond hunting!
It seems everybody’s playing Minecraft these days. So I’m afraid I felt compelled to play a contemporary game for once. Well, it’s got a nice retro feel to it anyway. It’s too familiar to be worth a full review, but I’m going to be having a quick look at the Pocket Edition on my Android phone. (I make it a matter of principle not to own a PC capable of running the full edition.)
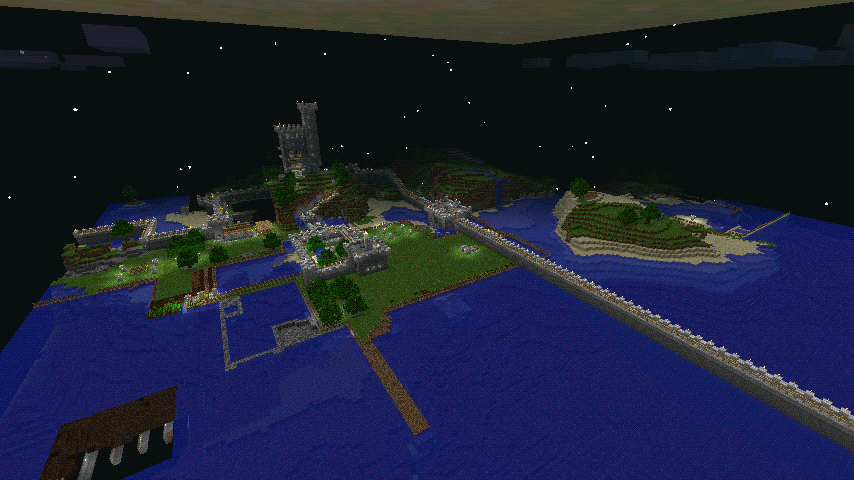
So what’re the main differences between Minecraft Pocket and PC? The first is the playing area: just 256×256 blocks, with space for 64 up and 64 down. It sounds too tiny to be of any interest, but although it seems so small underground that you’re mining to the edge of the world all the time, above ground it’s weirdly big enough to get lost in, at least for a short time. Above is my first serious world, and you can see about 75% of it; there’s a bit more behind the camera and in the far distance.
The second main difference is the lack of caves and lava underground. This is a shame; it makes mining harder but more repetitive. Then there’s the lack of the Nether; in its place is the Nether Reactor, a sort of mini-version you can build in your backyard. And finally there’s a whole host of minor creatures and features lacking, such as Endermen and alchemy. On the whole, after the December 2013 update it looks very like the PC version, though I don’t see any real excuse for features being missing seeing as new phones are now more powerful than the typical ageing PC you find in people’s homes.
That quick overview done with, I thought I’d show you how I’ve been getting on with the game. Only a few stills for now as I haven’t got moving video figured out yet. I’ve had the game nearly six months, and I start a new world every few weeks (always Survival, max difficulty). My current one is based on a particular well-known seed: to try it enter “detailed” (no quotes) when prompted for a seed for a new game. It spawns you on a tiny island with just a couple of trees. There’s a similar island nearby, but nothing else that I can see. There are a handful of animals around.
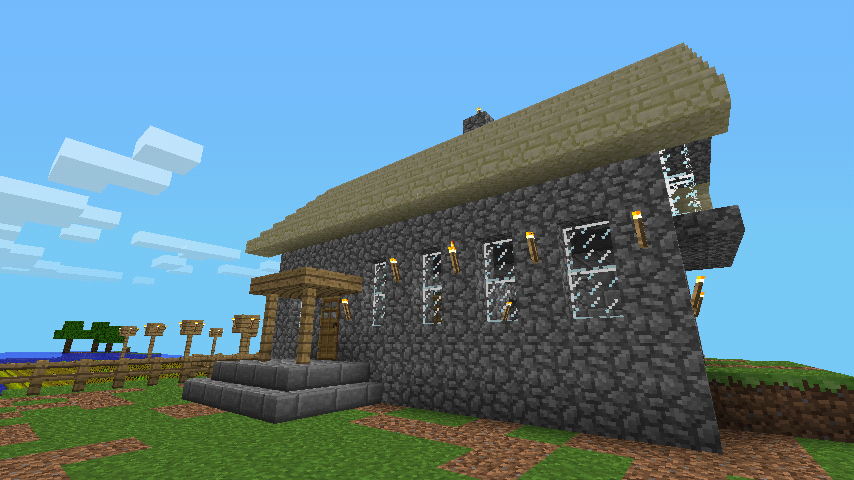
Here is my cottage. It’s a functional design I’ve perfected over a few worlds. The interior is 4×11 blocks, on two main floors with two rooms per floor, divided where you see the chimney. Within the floorplan there’s also a cellar with smelting equipment, a sub-cellar strongroom, and a spiral staircase leading deep down to the mine. My bed is actually within the wall space, up to the right where you see the bay window. This dates from when I didn’t know how to place a bed on half-blocks. I’ve kept with it because I quite like it and it saves some fannying around; the downside is that the whole world can see me changing into my pyjamas. The roof by the way is built out of sandstone steps; wooden ones make more sense but I’m fed up with them catching fire. In the background you can see the night-lighting for my extensive wheat farm, and also the second island in the far distance (I don’t go there much if at all).
Now here is my tower, a small version of another design I’ve perfected over time. Useless really, but I think it looks cool. The interior floorplan is 5×5 blocks. The staircase turret is 3×3 blocks inside, but this design allows them to overlap by just one block effectively without taking up any useful space. I begin this spiral staircase on the first floor, partly because it demands a fancier overhanging design, partly because in larger towers I like to have a “grand staircase” leading up from the ground floor.
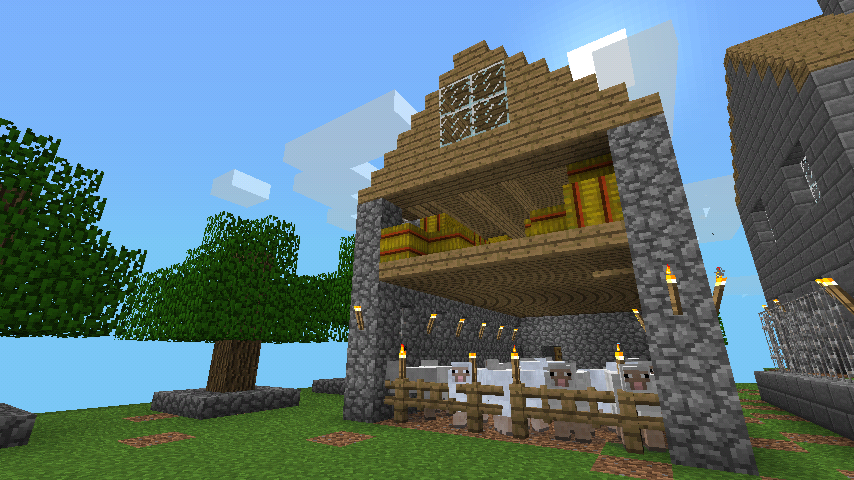
This is my barn, the first I’ve built. Filling the hayloft upstairs was the reason I had to have such a large wheat farm. Downstairs live a small section of my population of sheep. I didn’t have any sheep to start with, but one turned up from I don’t-know-where, soon followed by another. So why not breed them? I’m afraid I got a bit carried away and only stopped when I realised they were eating my lawn faster that it could replace itself. Barns aren’t any use of course, except for the obvious fire hazard. I expect it will produce a dramatic conflagration if I get bored one day. (Don’t worry, I’ll let the sheep out first; necessity has made me a total pacifist when it comes to Minecraft, and it pains me when I watch other people hacking animals to death as soon as look at them.)
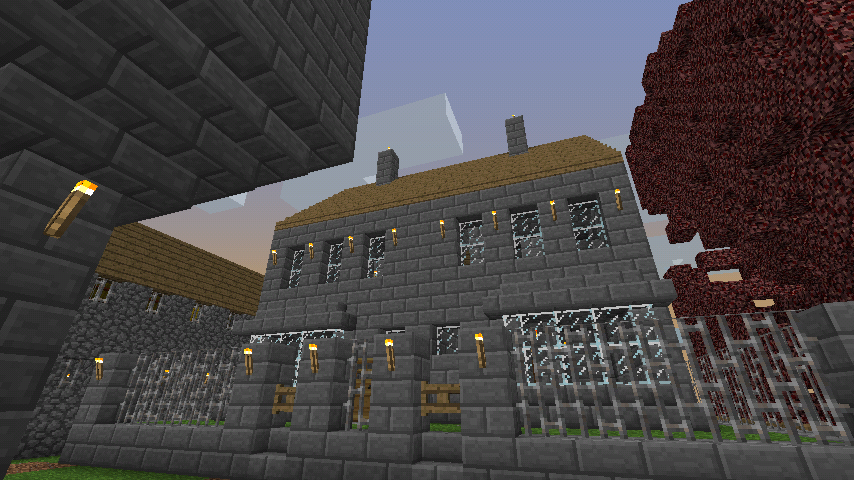
Finally my pair of townhouses (with Nether Spire in background which I’m currently demolishing). They’re mirror images but otherwise built to identical plans. Each has a front parlour, back living room, and ground floor kitchen extension. Upstairs there are two bedrooms plus bathroom. Plus an attic, and of course the obligatory cellar with smelting equipment (I do a lot of smelting, but tell the wife it’s a Laundromat). The block resolution is so crude there’s very little room for moving about in once you build interior walls, but that restriction is part of the charm of the game.
So that’s my little world. And I do mean little – most of the time has been spent filling in the sea with rubble from the mine to get space to build on. Now if you’ll excuse me I must get back to demolishing that hideous eyesore of a Nether Spire.