Tag Archives: Android

Pocket Minecraft: Mining for Sand

You might think that sand is hardly such a scarce resource it needs a guide to extracting it. And on top of that, why would you want so much of it anyway? I’ll deal with the second question later, but first: Why might sand be hard to get hold of?

You may well live in a world with great hills made of sand, in which case of course you just get busy with a shovel. It does tend to scar the landscape rather horribly, but as in the screenshot above you can place soil over the top when you’ve mined out all the sand, and eventually the grass will grow green in that valley once more.

But I’m currently playing in a world with the notorious “detailed” seed, where the land area is practically non-existent. So, I mine sand from the sea bed. That’s not difficult when the water is reasonably shallow, but in the ocean deeps things are tougher. It takes so long to sink to the bottom that you don’t have time to collect what you’ve dug out before resurfacing, and you end with a mess of scattered bits and bobs like you see above. You can try and organise yourself so that you dig for a while, then collect for a while, but it’s still a pain, especially considering the ragged mess of stony potholes the seabed soon becomes.

This is my solution: seal off the seabed with stone, then mine it from below. Grab plenty of stacks of that cobblestone you’ve been hoarding, find an area of underwater sand, and place a layer one cube thick on top of the sand, as you can see below. It’s still quite time-consuming, but it doesn’t seem as bad as the traditional method.

Where the seabed is uneven make sure you cover any blocks of sand visible from the side as well, and be especially careful not to leave any gaps or “bubbles” of water in the stonework or they’ll cause havoc later. Once you’ve done that, dig a mineshaft 16 blocks deep in the direction of the sandbank until you find it. Then it’s just a matter of digging the stuff out with shovel and pick.

Above you can see what a large sand mine ends up looking like. Note the uninvited visitor in the background. It seems impossible to keep underground quarries illuminated well enough to stop monsters spawning, but they’re not such a bad problem in practice.

If you accidentally breach the sea bed and water starts pouring in, don’t panic. All you need to do is place a single block of cobblestone on the floor and stand on it while you fill the hole in the ceiling. It’s high enough to keep you out of the floodwater as long as it’s not pouring from directly above you.

So why do I want such mountains of sand anyway? I happen to think buildings made out of sandstone look rather nice, at least compared to the other blocks available in the game. Combined with that, I have a problem with a sort of inadvertent megalomania. I’ll have an idea for a building that appeals, and start constructing a fairly modest structure. But ideas for expansion come thick and fast, and the plans expand to vast proportions with a consequent insatiable demand for raw materials.

The “Palace of Light” you see here is my latest project. It started as a small pool with a fountain, with sandstone archways surrounding it. A cool and shady place to relax on a summer’s day perhaps. But it just kept growing, and was only forced to stop to avoid flattening my humble abode you see next to it. The frontage isn’t enormous, but it extends backwards to nearly twice the distance. You can still see the original fountain through the window. What will I use it for? Nothing, probably. The giant structure out of sight behind me when I took the picture, also of sandstone, and of which possibly more another time, I use for keeping pigs in.

Minecraft – Mining for Diamonds

A lot of people ask how to find diamonds in Minecraft, and sometimes they get bad advice. I was reminded of this while watching Kikoskia in his YouTube Let’s Play Minecraft Hardcore. It’s a wonderful series, wouldn’t miss it for the world, and what got me interested in the game in the first place. But yesterday he spent nearly twenty minutes looking for diamonds and didn’t find a single one. That wouldn’t surprise Kiko fans in the least, given his “human randomiser” strategy for exploration.

I’m not just going to show you how to find diamonds in about five to fifteen minutes, I’m going to try to explain and justify the efficiency of the strategy too. It’s for the Pocket Edition by the way, though on the PC things should be much the same. So here’s the condensed version of the two-step guide to finding diamonds:

1) Dig down to a suitable depth – exactly 48 blocks below sea level is good.

2) Dig the smallest tunnel in the straightest line until you find diamonds.

Now to expand on point 1). You might ask “How do I reach exactly 48 blocks down? I always lose count”. Answer: dig to exactly sea level. Then craft exactly 48 compact stair blocks. Create a staircase out of these blocks. Simple, and it’ll make climbing up and down the mine a whole lot easier than with whole-block steps. I’m not sure about the exact figure of “48” by the way – I don’t look up details like this online if I can help it, but it works for me.

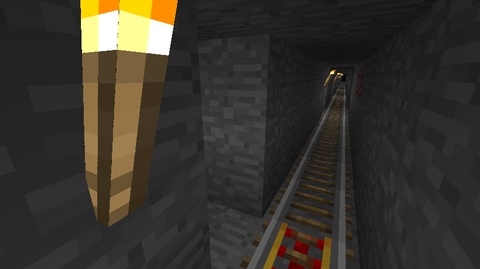
As for point 2). The smallest tunnel is 1 block wide by 2 blocks high. The straightest line means you simply go straight and level, and never deviate to the side or up and down. Put down a torch exactly every 8 blocks, always to the same side so you can tell later whether you’re coming or going. To avoid losing count, always ignore any goodies you uncover until you’ve made your 8 steps, then go back and dig them out. I always backfill when I dig out the ores – it stops monsters spawning in the cavities, and stops the mine turning into Swiss cheese.

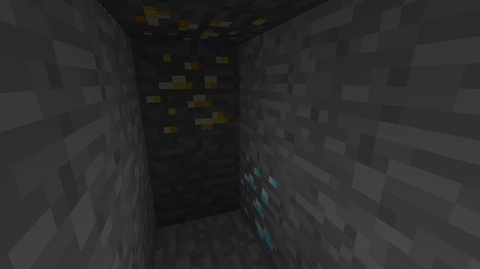
After putting down a maximum of 32 torches you’ll have reached the edge of the map. On average you’ll find diamonds (or gold) about every 200 steps, with an average of perhaps 5 blocks per deposit. The screenshot below shows a rare example of discovering gold and diamond at exactly the same moment – believe it or not it’s what actually happened when I went to get pictures for this article. But there’s a fair chance you’ve come up empty handed. What now?

Answer: dig new tunnels at right angles to this first one, exactly every 8 blocks, right by where you put down the torches. Keep grinding away till you’ve got what you want. Always use the best equipment by the way – stone picks went out with the, er, Stone Age. See below for a mine where the tunnels have been dug out to the left.

Why this dimension of tunnel? Digging a 1×2 block tunnel uncovers 8 fresh new blocks for each 2 blocks removed (2 to each side, 1 above and below, 2 straight ahead), or a 4:1 ratio. That’s the maximum you can practically achieve, and means you get the most use out of your tools and time.

Why space the tunnels 8 blocks apart? It’s a good compromise. The idea is to mine out an area thoroughly while exploring as much new ground as possible, that is without “discovering” the same deposit twice.

What do you do when you’ve mined the whole level with these long thin tunnels 8 blocks apart? You dig new tunnels exactly half way between them, that is 4 blocks apart. And when you’ve dug all these? Go down exactly 4 blocks and start the whole thing all over again.

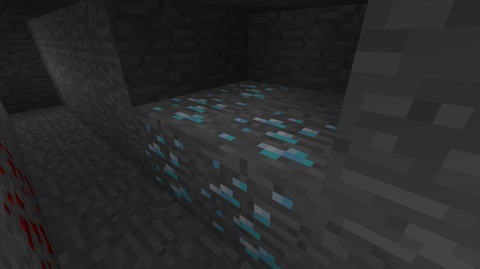
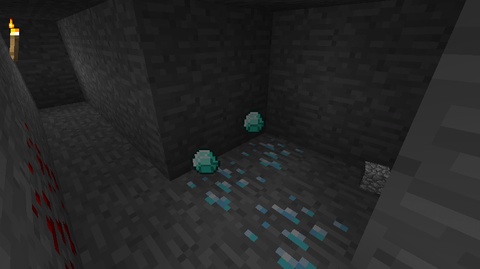
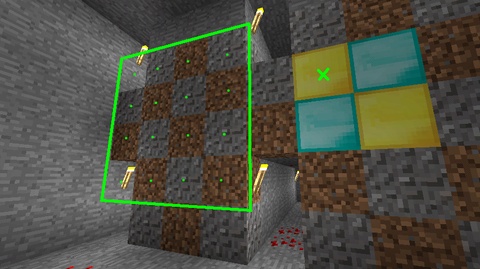
What’s the logical justification for this method? How can we show it uses little effort while being unlikely to miss anything of value. Each deposit of diamonds (or gold) is based on a 2×2 block floor plan. There is usually a second layer on top, making 2x2x2. Sometimes there’s a third layer too. See above for an example. They all seem to be in this pattern, though I suppose two deposits could overlap confusing things. To simplify, suppose we are looking for the 2×2 “Battenberg cake” vertical slice through a deposit as shown in the diagram below. Actually the deposit will be made of two slices, improving our chances of finding it, but each slice will probably not be complete thus reducing our chances. Then again, there’s the cases where there’s a third layer, again improving our chances.

Suppose we’ve been tunnelling into the screen. The screenshot shows a section through the mine. Notice there is a repeating pattern, 4×4 blocks square, of which only 2 have been dug out. So suppose we are looking for a slice like the one to the right, but it could be anywhere. What are the possibilities for its position? Imagine moving the slice so the small green cross matches the position of any of the dots. Allowing for the repetition of the tunnel pattern there are 16 distinct dots where the slice could be. Notice that only 2 of these have no blocks of the slice exposed in the tunnels where we can see them (the position where you see it now is one such). Therefore you will spot it 87.5% of the time, despite only having dug out 12.5% of the blocks.

I hope that makes things clear. If the explanation wasn’t clear, I hope at least the method was. Happy diamond hunting!

Minecraft Pocket Edition – Overview

It seems everybody’s playing Minecraft these days. So I’m afraid I felt compelled to play a contemporary game for once. Well, it’s got a nice retro feel to it anyway. It’s too familiar to be worth a full review, but I’m going to be having a quick look at the Pocket Edition on my Android phone. (I make it a matter of principle not to own a PC capable of running the full edition.)

So what’re the main differences between Minecraft Pocket and PC? The first is the playing area: just 256×256 blocks, with space for 64 up and 64 down. It sounds too tiny to be of any interest, but although it seems so small underground that you’re mining to the edge of the world all the time, above ground it’s weirdly big enough to get lost in, at least for a short time. Above is my first serious world, and you can see about 75% of it; there’s a bit more behind the camera and in the far distance.

The second main difference is the lack of caves and lava underground. This is a shame; it makes mining harder but more repetitive. Then there’s the lack of the Nether; in its place is the Nether Reactor, a sort of mini-version you can build in your backyard. And finally there’s a whole host of minor creatures and features lacking, such as Endermen and alchemy. On the whole, after the December 2013 update it looks very like the PC version, though I don’t see any real excuse for features being missing seeing as new phones are now more powerful than the typical ageing PC you find in people’s homes.

That quick overview done with, I thought I’d show you how I’ve been getting on with the game. Only a few stills for now as I haven’t got moving video figured out yet. I’ve had the game nearly six months, and I start a new world every few weeks (always Survival, max difficulty). My current one is based on a particular well-known seed: to try it enter “detailed” (no quotes) when prompted for a seed for a new game. It spawns you on a tiny island with just a couple of trees. There’s a similar island nearby, but nothing else that I can see. There are a handful of animals around.

Here is my cottage. It’s a functional design I’ve perfected over a few worlds. The interior is 4×11 blocks, on two main floors with two rooms per floor, divided where you see the chimney. Within the floorplan there’s also a cellar with smelting equipment, a sub-cellar strongroom, and a spiral staircase leading deep down to the mine. My bed is actually within the wall space, up to the right where you see the bay window. This dates from when I didn’t know how to place a bed on half-blocks. I’ve kept with it because I quite like it and it saves some fannying around; the downside is that the whole world can see me changing into my pyjamas. The roof by the way is built out of sandstone steps; wooden ones make more sense but I’m fed up with them catching fire. In the background you can see the night-lighting for my extensive wheat farm, and also the second island in the far distance (I don’t go there much if at all).

Now here is my tower, a small version of another design I’ve perfected over time. Useless really, but I think it looks cool. The interior floorplan is 5×5 blocks. The staircase turret is 3×3 blocks inside, but this design allows them to overlap by just one block effectively without taking up any useful space. I begin this spiral staircase on the first floor, partly because it demands a fancier overhanging design, partly because in larger towers I like to have a “grand staircase” leading up from the ground floor.

This is my barn, the first I’ve built. Filling the hayloft upstairs was the reason I had to have such a large wheat farm. Downstairs live a small section of my population of sheep. I didn’t have any sheep to start with, but one turned up from I don’t-know-where, soon followed by another. So why not breed them? I’m afraid I got a bit carried away and only stopped when I realised they were eating my lawn faster that it could replace itself. Barns aren’t any use of course, except for the obvious fire hazard. I expect it will produce a dramatic conflagration if I get bored one day. (Don’t worry, I’ll let the sheep out first; necessity has made me a total pacifist when it comes to Minecraft, and it pains me when I watch other people hacking animals to death as soon as look at them.)

Finally my pair of townhouses (with Nether Spire in background which I’m currently demolishing). They’re mirror images but otherwise built to identical plans. Each has a front parlour, back living room, and ground floor kitchen extension. Upstairs there are two bedrooms plus bathroom. Plus an attic, and of course the obligatory cellar with smelting equipment (I do a lot of smelting, but tell the wife it’s a Laundromat). The block resolution is so crude there’s very little room for moving about in once you build interior walls, but that restriction is part of the charm of the game.

So that’s my little world. And I do mean little – most of the time has been spent filling in the sea with rubble from the mine to get space to build on. Now if you’ll excuse me I must get back to demolishing that hideous eyesore of a Nether Spire.